Adding Libraries to your Sketch
What are libraries?
Libraries are program modules that other people wrote and that you can
integrate into your project in order to use them. The classic Arduino IDE
comes with lots of libraries for purposes like controlling stepper motors,
reading and writing the EEPROM and so on.
You can find a description of available Arduino libraries on the
Arduino homepage.
To add a library, choose Project > Add/Import Sketch Library >
Core to choose one of the libraries provided by Arduino or your
board's manufacturer.
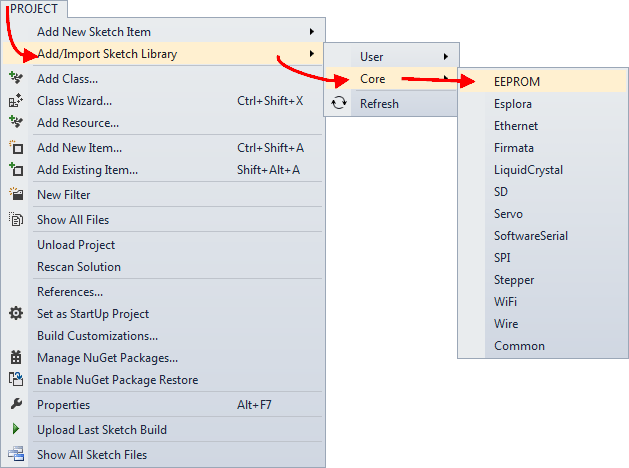
If you have created your own libraries, then you can add them in the same
way with Project > Add/Import Sketch Library > User.
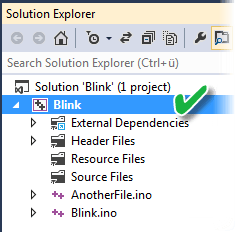
If the Add/Import Sketch Library menu item
is missing, then you most likely have selected the whole solution in the
Solution Explorer, instead of the project:
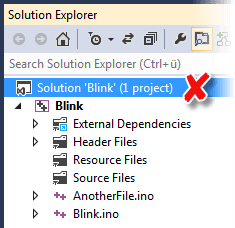
(Solutions are a collection of individual projects in Visual
Studio/Atmel Studio, but at this point, we don't need to know more about
them.)
If the Solution Explorer is not shown, make it visible by pressing
[Ctrl+Alt+L]
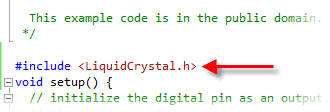
Visual Micro adds the necessary include directives into your
code:
under the "Core" menu item, Visual
Micro always shows those libraries that fit to the selected board.
If you switch to a different board you might notice that the list of
libraries changes as well.
Search path for user libraries
Visual Micro searches for user libraries in the "Libraries" subfolder of
your sketchbook folder, provided you have specified a sketchbook location in
the Configuration Manager. If
you did not specifiy a sketchbook location in the configuration manager,
then Visual Micro searches in a "Libraries" subfolder.
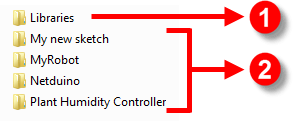
1 is the user libraries folder, 2 are
your sketch folders.
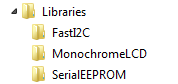
For every library, you must create a subfolder in your "Libraries"
folder:
Installing additional libraries
The "Add libraries" menu lets you choose among those libraries that are installed and avaliable on your PC.
You can install additional libraries from using the "Manage
Libraries" tab of the Visual Micro Explorer.