Debugging with Different Ports, Pins and Speeds
If you need your serial port for your own purposes, e.g. for communication to
other devices, then you can instruct Visual Micro to use a different serial port
or you can freely define to use pins of your choice as serial ports.
In general, Visual Micro supports all the serial communication
options your Arduino board offers. Vice versa, it depends on your board's
capabilities which options you can choose. For example, the Arduino MEGA has 4
serial ports to choose from, while many other boards only have one.
Visual Micro uses the upload port only while the sketch is uploaded,
afterwards it releases it and it can be used for other purposes.
Using Separate Ports for Debugging
The port used for debugging is kept open by Visual Micro as long as the
debugging session is running.
Using different transport methods
Arduino provides a multitude of serial communications methods which are all
supported by Visual Micro. Advanced users can select the transport
method of their choice and can take advantage of the flexibility needed for
certain constellations.
All settings are project dependent and can be found in the
Project Properties
window.
Remote Port
Specifies which port of your board shall be used for
debugging.
The names of the settings like "Serial1" etc.
are related to the names of the
Arduino
library "Serial" functions for the respective ports.
Make sure your board supports the ports you have selected.
For debugging over the network with the Arduino Yún, select "
Console"
here.
Remote Speed
Specifies the speed (baud rate) that is used for debug
communication.
This value
must match the
Local Speed
setting in your
Project Properties
window.
Remote Transport
Specifies which transport method (class) of the Arduino
library shall be used for debug communications.
"
HardwareSerial" is the Default using the UART circuits
of the board's CPU.
"
SoftwareSerial" uses purely software based serial
communication, where you can freely choose the RX (receiving) and TX
(transmitting) pins which serve as serial port.
Therefore, with "
SoftwareSerial"
you must also specify these RX and TX pins in the respective fields of
the project properties.
"
Bridge" is used for the Arduino Yún in
conjunction with the
so-called bridge.
"
Udp" is used for the ESP32/ESP8266 Platform for Wireless Debugging (
Watch Video)
Please note that the terms HardwareSerial and
SoftwareSerial refer to the method in which outgoing signals are
generated and incoming signals are decoded (with hardware in your
processor or with a software module from the Arduino library).
HardwareSerial and SoftwareSerial do not refer to hardware or software
handshake (RTS/CTS vs. XON/XOFF). Arduino does not use hardware
handshake with any of its serial ports.
Remote Pin RX
When using SoftwareSerial as remote transport method,
you must specify which pin of the board shall be used as the RX (receiving)
pin of the software emulated serial port.
With HardwareSerial, the pins to be used are
determined by the hardware and, therefore, cannot be changed.
Remote Pin TX
When using SoftwareSerial as remote transport method,
you must specify which pin of the board shall be used as the TX
(transmitting) pin of the software emulated serial port.
With HardwareSerial, the pins to be used are
determined by the hardware and, therefore, cannot be changed.
Pins specified by "Remote Pin RX" and "Remote Pin
TX" can only be used for debugging, if they are connected to a
Serial-To-USB adapter like
this
one.
If only debug trace (without breakpoints) is required, then you only
need a TX pin. If you want trace and breakpoints, you need two pins.
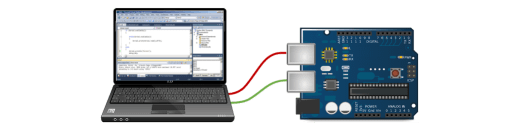
Using a Different Local (=PC) Port for Debugging
To change to local (=PC) port used for debugging,
open the Project Properties window
and change the settings for "Local Port" and "Local Speed".
Debugging over a network with Arduino Yún
To debug over the network, use the following settings in the Project Properties
window:
Local Port = <Enter the IP address of the Arduino Yún in your network>
RemotePort = Console
RemoteTransport = Bridge
Using Serial adapters
If your board has only one USB port, you can get yourself a second port with
the use of an external Serial Adapter, like
this one.
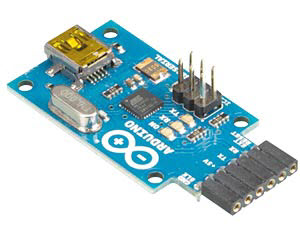
By using
SoftwareSerial, you have a large
freedom of choice of pins that you can use as the second serial port. You can
use this second port as described above, and can remove the Serial adapter
later, if your are not debugging your board anymore.
Interestingly, for simple Arduino boards, the
serial port hardware is the most expensive part of the board.
If you are often working with small boards like the Arduino Nano, you
can save money by buying an external Serial adapter and using an Arduino
Mini instead. Although the Mini is marked as "retired" on Arduino's
official page, you will find clones everywhere on the web, for
ridiculously low prices.